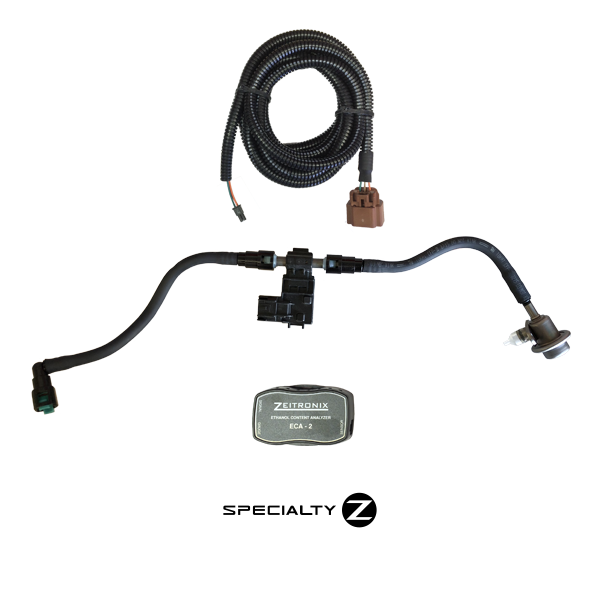
Naturally Aspirated
Use our Flex Fuel kit – Since the car has to be tuned, it will have EcuTek. If the Bluetooth adapter was
purchased, it can show ethanol content once this feature is turned on in the tune. An E% gauge is not
required, but the customer can choose to install one if they prefer or if they don’t use the EcuTek BT adapter and app.
Boosted [Turbo]
Use our Flex Fuel Kit without the Nissan OEM provided fuel hose assembly – Since the car is boosted, it
is assumed the customer is using a CJ Motorsports or Fast Intentions fuel supply kit. In this case, there is
a fitting just after the fuel filter that will be disconnected, and our Flex Fuel sensor will be attached at
this location using the provided AN fittings. An E% gauge is not required, but the customer can choose to
install one if they prefer or if they don’t use the EcuTek BT adapter and app.
Boosted [Supercharged]
Supercharged vehicles can’t use Fast Intentions fuel kits, CJ Motorsports is the only option. The kit
requires completely different routing of fuel hoses. CJM fuel rails are also required for Supercharged
vehicles, as the orientation of the throttle bodies won’t clear the factory rails.
Note: With either Boosted application, a minimum of 1050cc injectors is required. These will provide
enough fuel for about 600-wheel horsepower on a supercharged engine.
Zeitronix ECA-2 Wiring
There are only 3 wires you need to use and worry about, red (power), black (ground), white/blue (0-5v signal). The rest of the wires will NOT be used. You can tape them up and secure them. The power wire for the ECA-2 is the red wire and tees into a yellowish or tan wire (in a group of three wires), which is connected to the BCM (Body Control Module) behind the passenger side kick panel. On models like the Q, this connector is missing. We recommend getting power from PIN 125 (red wire) for the 12v power source (ignition switched). This power source can also be used on any other model as well (not 2019+ 370Zs).
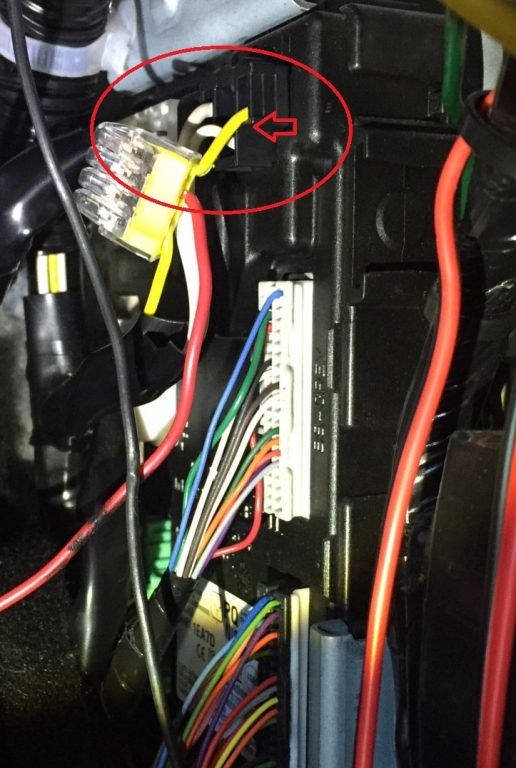
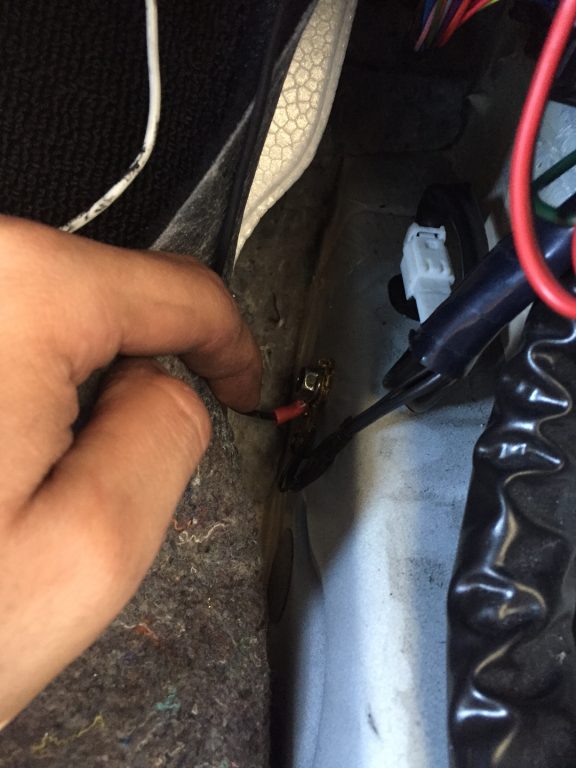
The ground connects just below the BCM where a group of factory grounds are located.
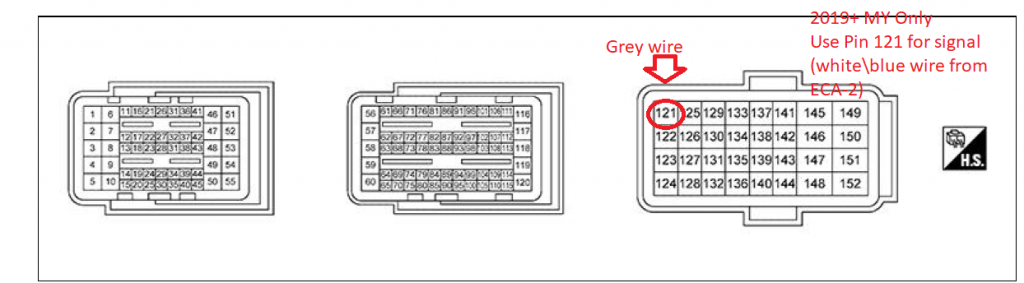
The content signal wire (white/blue) connects to PIN 102 from the ECU. You cut this wire, don’t T into it. It was a part of the EVAP system, but is not important. The color of wire on PIN 102 changes between different years and models. On 2019+ 370Zs you will use PIN 121 which is also a grey wire.
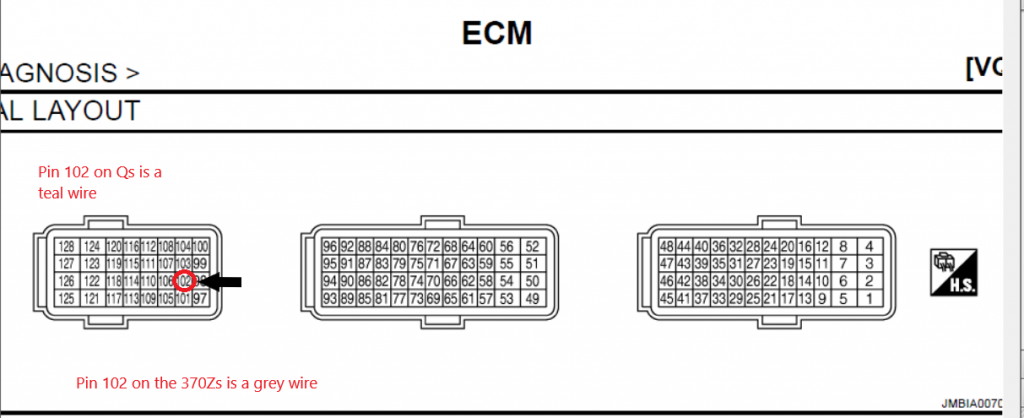
The above diagram is when you’re looking at the backside of the connector, with the wires coming out.
Note the small far right image with ‘H.S.’ which stands for Harness Side. When you count your pins,
make sure you’re counting from the side of the harness with wires, not the pin hole side.
The above diagram is when you’re looking at the backside of the connector, with the wires coming out.
Note the small far right image with ‘H.S.’ which stands for Harness Side. When you count your pins,
make sure you’re counting from the side of the harness with wires, not the pin hole side

