Posted by : Sebastian Chacoff On : January 22, 2015
0
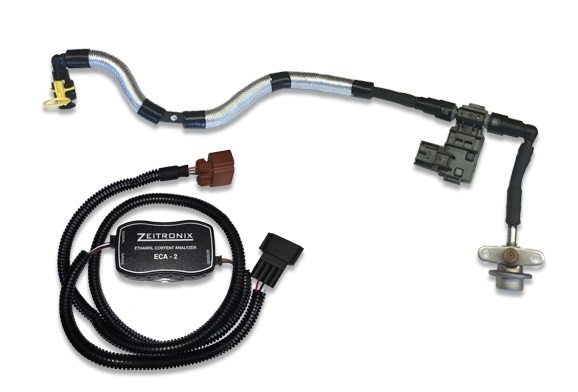
We are proud to announce the release of the SZ Flex Fuel Kit for the R35 GTR. This kit makes for the simplest, cleanest, and quickest installation. We had our own mold made to make the connection between the ECA-2 and ECU seamless and trouble free. We use a brand new Nissan fuel return hose to make the kit look like it came from the factory.
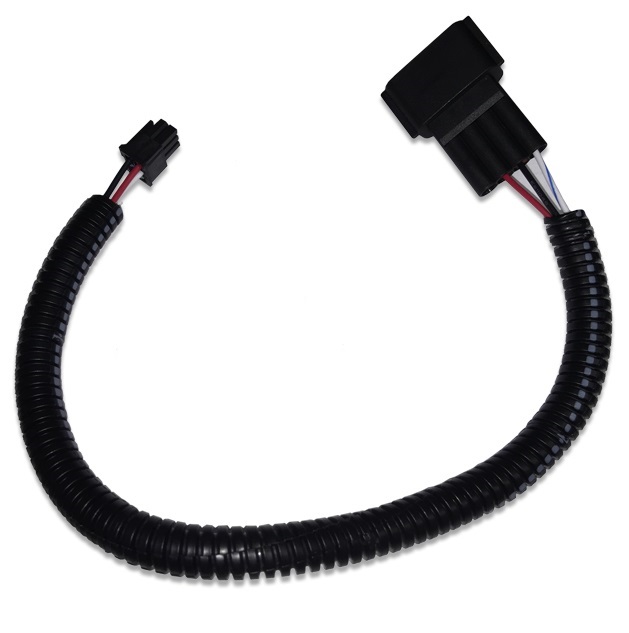
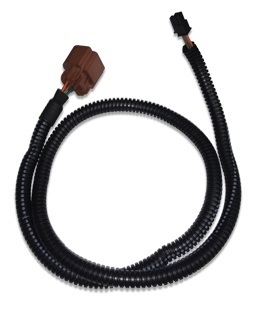
Our ECA-2 to ECU harness. Our molded connector on the right hand side. Both harness’ cut to length.
Posted by : Sebastian Chacoff On : January 18, 2015
0
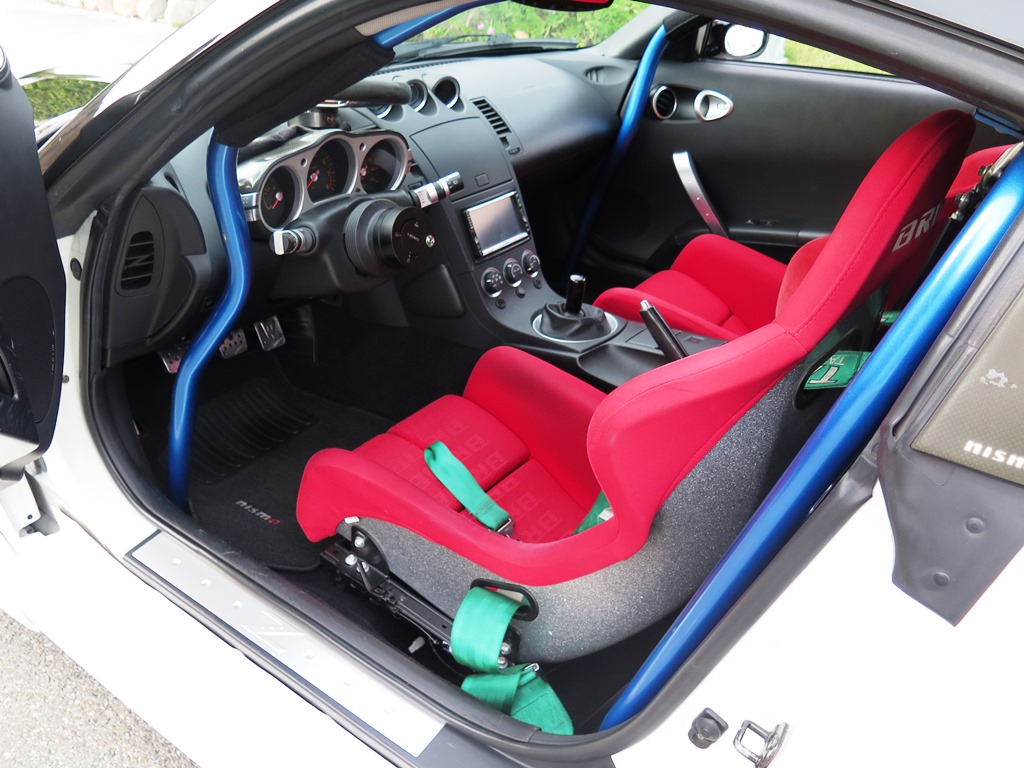
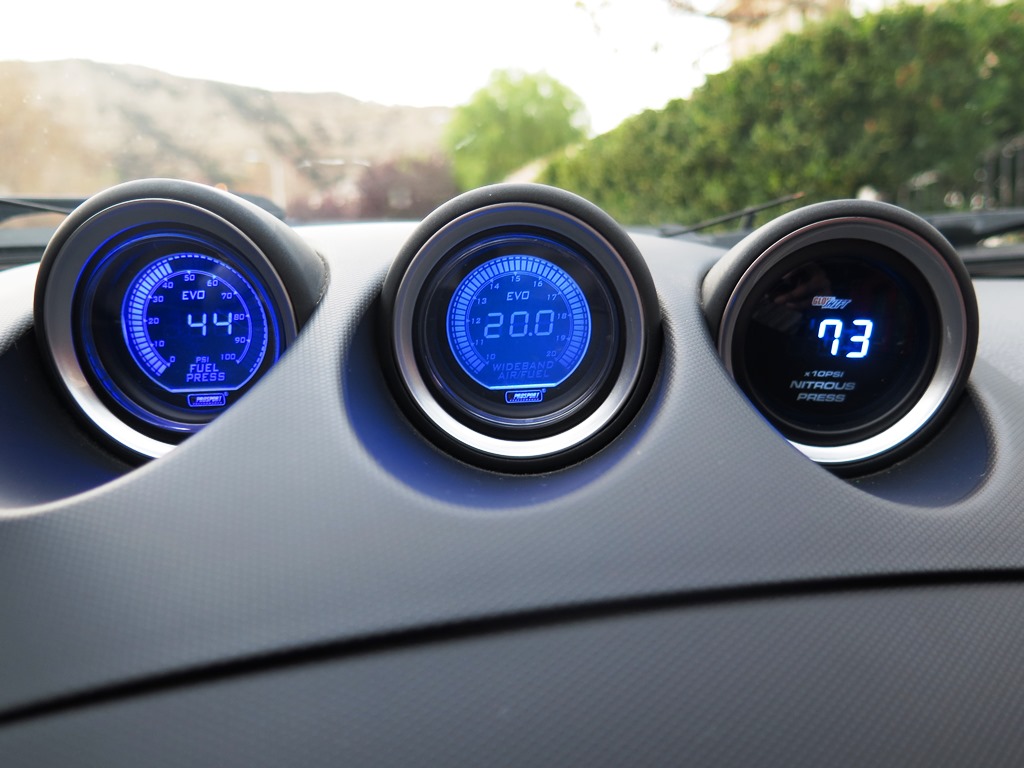
Corey brought us his widebody 350Z for some power upgrades in the form of nitrous oxide. We went to work installing the Dyno Tune Z33 Nitrous Kit. Besides installing the main portion of the nitrous system that includes a fogger nozzle, fuel & nitrous solenoids. A bottle heater was installed that turns off and on based on pressure in the nitrous feed line. This makes sure that the appropriate amount of nitrous is injected. The nitrous jets are calculated based on a certain nitrous pressure. So if the pressure is too low, the power will considerably drop and the mixture ratio of fuel is dramatically off. Same for too much pressure. A nitrous pressure gauge was installed in the factory gauge pod on the dash to properly monitor the nitrous when used on the street. An NOS brand controller was used to make sure our nitrous turns on and off at a certain RPM and throttle opening. Nitrous can easily wreak havoc on connecting rods if used too low of an engine speed. It can also spell disaster if not turned off in time before the rev limiter hits. A purge system is also used to ensure fresh nitrous is on the ready at the tap of a button.
We installed three switches underneath the AC controls. One is for main nitrous activation, purge, and bottle heater.
We also installed a fuel pressure gauge and wideband AFR gauge. Nitrous pressure gauge on the very right.
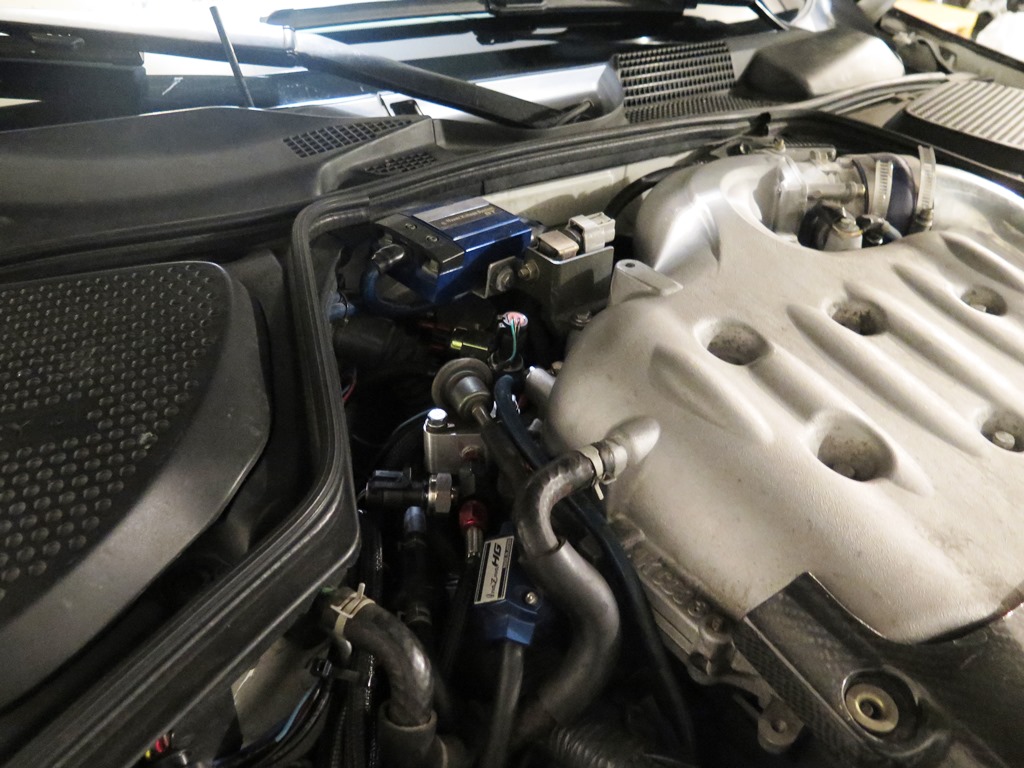
The main fogger nozzle was installed underneath the main TB pipe which cannot be seen for a stealth install. Here you can barely tell anything is installed related to nitrous. The Dyno Tune system includes a nice fuel adapter to easily tap in for fuel. We installed 2 steps colder from stock spark plugs to keep things happy.
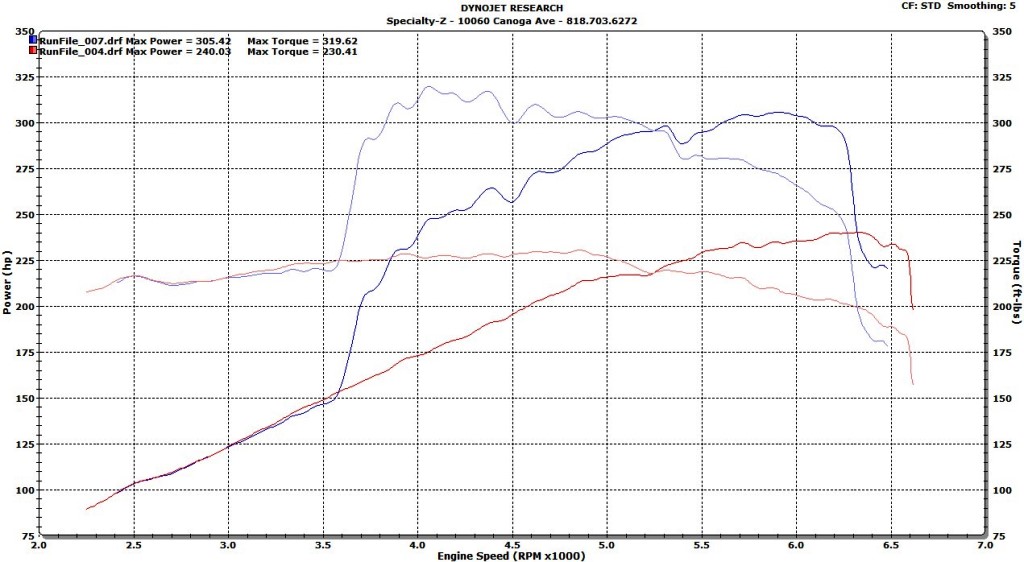
You may have been wondering the size “shot” we installed. Corey originally wanted a 100 HP shot and I declined for matter of safety on 91 octane. We both compromised in the middle and installed a 75 HP shot of jets. We made sure the non nitrous tune was where it needed to be. We then adjusted the tune to take into account the nitrous and fuel mixture on 91 octane. You can see that out 75 HP works beautifully. Just the right amount of power and safety when you install all the correct parts (and install them correctly!).
Posted by : Sebastian Chacoff On : January 4, 2015
3
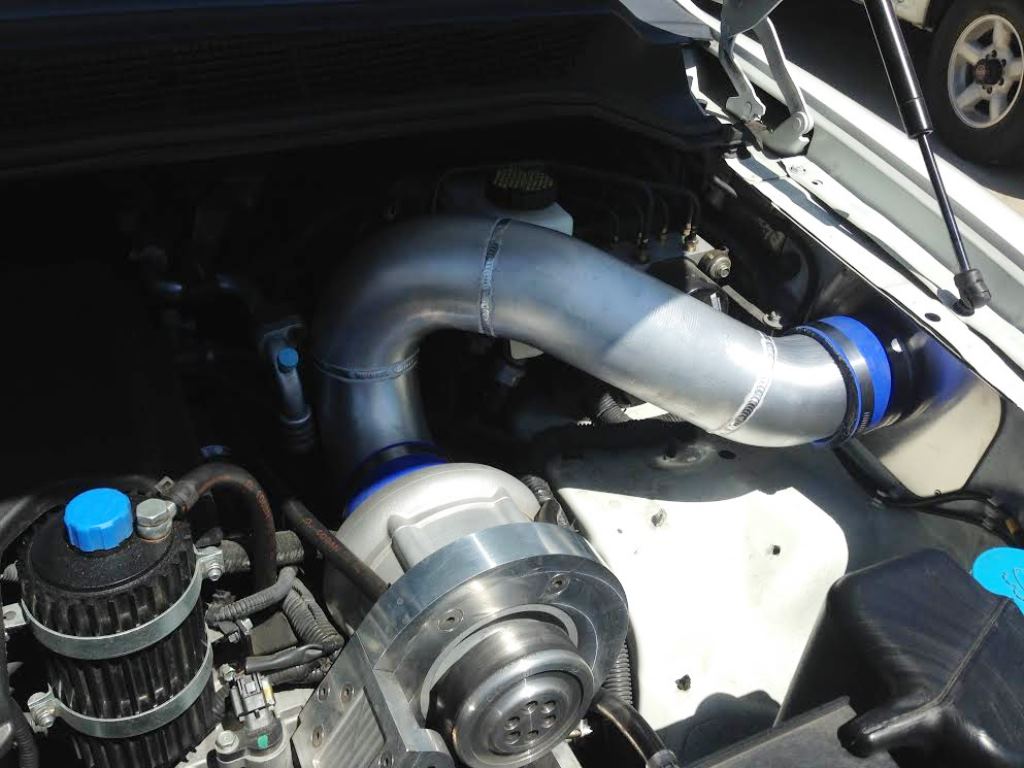
Our Nissan Titan truck now has 60k miles on the odometer and the last 20k miles have been under the hard use of forced induction. What started as a utility and towing vehicle now is a “hot rod” pick up. Able to perform its original intended duties with more ease we’ve been very happy with the truck’s performance and reliability all around. The auto trans has held up great with the added power and torque with the proper additional supporting modifications consisting of a valve body upgrade, larger capacity trans oil pan (that is finned), and cooler. Forced induction came the way of a GTM Rotrex Supercharger Kit. The truck was used as a the initial prototype and had no existing modifications. Its been over 2 years now and we’ve added modifications to the truck besides the GTM SC Kit. Our truck is a 2010 so it has a few more advancements from the earlier gen Titans like variable cam timing and stock exhaust upgrades that help make more power throughout the entire powerband.
The Titan as it spun the rollers bone stock a few years ago.
The video above shows the parts very well and features the angled intercooler placement to fit the front bumper perfectly.
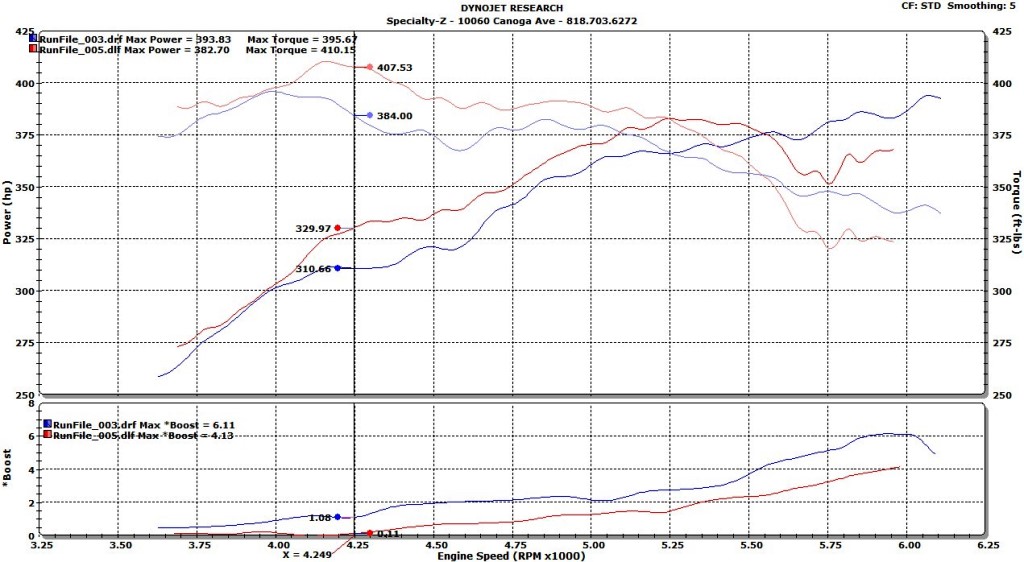
Here is our stock baseline in blue and the GTM SC kit making a peak of 5 psi at the very top of the RPMs. At 4500 RPMs the truck picked up 65 torque and 57 whp. Peak power is 108 whp higher and 70 more torque.
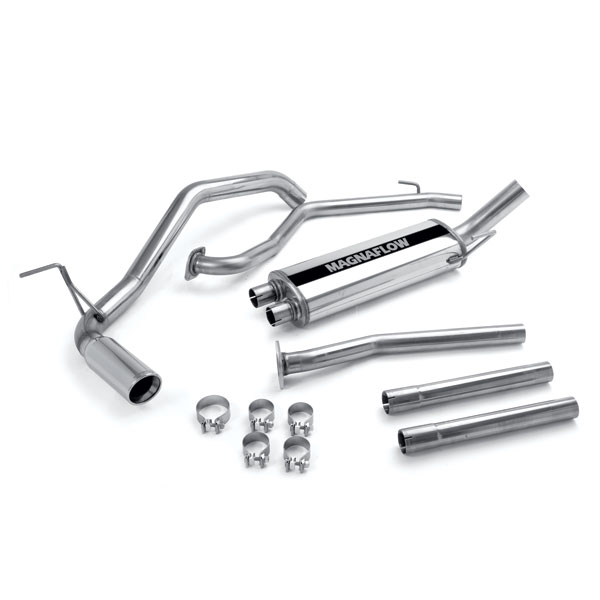
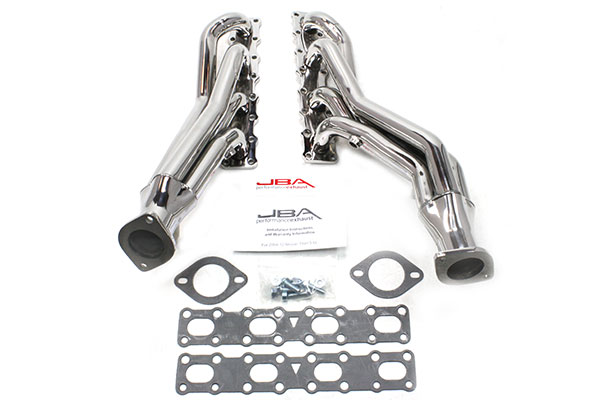
Never happy with what we have, we began the process of adding more modifications. A MagnaFlow Catback was added, Cajun Catted B-Pipes, and JBA Headers.
For the money, it is hard to beat this catback offered in the Titan\Armada community.
The JBA headers were very nice, but proved to be tough to install due to the flange holes being too small. We had to drill out each hole so we could install the headers onto the factory studs. Surprisingly even after 10k+ miles of forced induction and over 45k miles, the stock exhaust manifolds had survived and not cracked! NA Titans are known to severely crack their manifolds, check a previous post here.
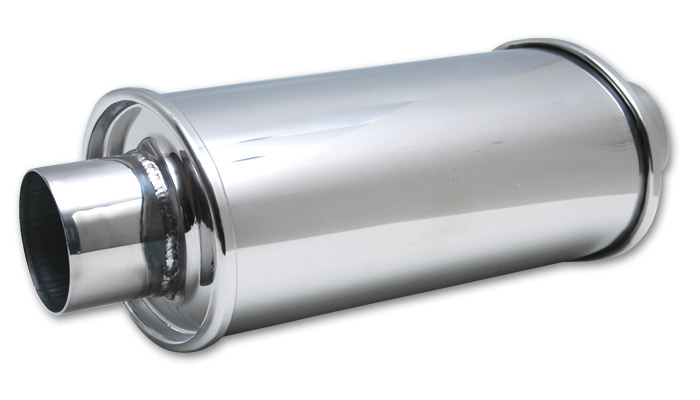
Once we had all our exhaust parts installed, the sound proved to be extremely loud, even with cats and a 22″ muffler. This was remedied with the addition of a Vibrant Ultra Quiet Resonator. This resonator did wonders in improving sound quality and lowering it.
The Vibrant UQ Resonator
We next moved to improving the induction of the GTM kit. In the video above you can clearly see the air filter located in the engine bay. We went a step further and made ourselves a “cold air intake” by relocating the filter to the upper fender area.
Our custom CAI. No more engine bay heat adding to the overall air intake temps. A nice plate surrounds our secondary pipe in the fender.
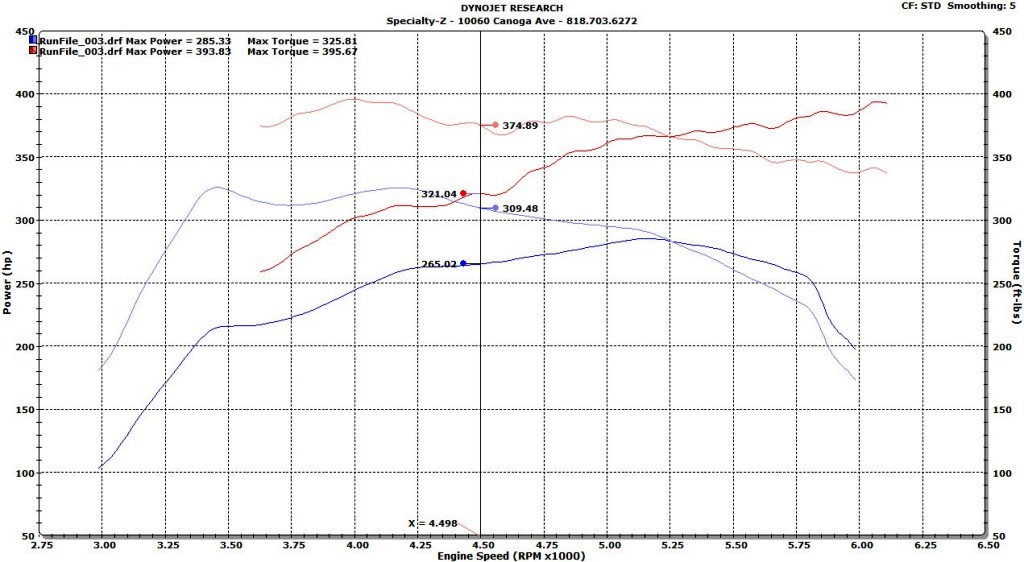
We hit the dyno after installing all our exhaust and induction modifications. Our blue run is the GTM SC Kit with NO other mods. Red is WITH our added modifications. We were NOT surprised to see the drop in power up top. One downside of actually making the engine more efficient is you make it harder for there to be restriction which is a measurement of boost. Since we removed restriction, we lost boost, and hence we lost some power. Our power loss was specific to the high end of the RPMs coming in at 5500 RPMs. Our mods proved that making things more efficient we were able to gain more low end power with less boost. What are we to do next? How do we regain our power up top?
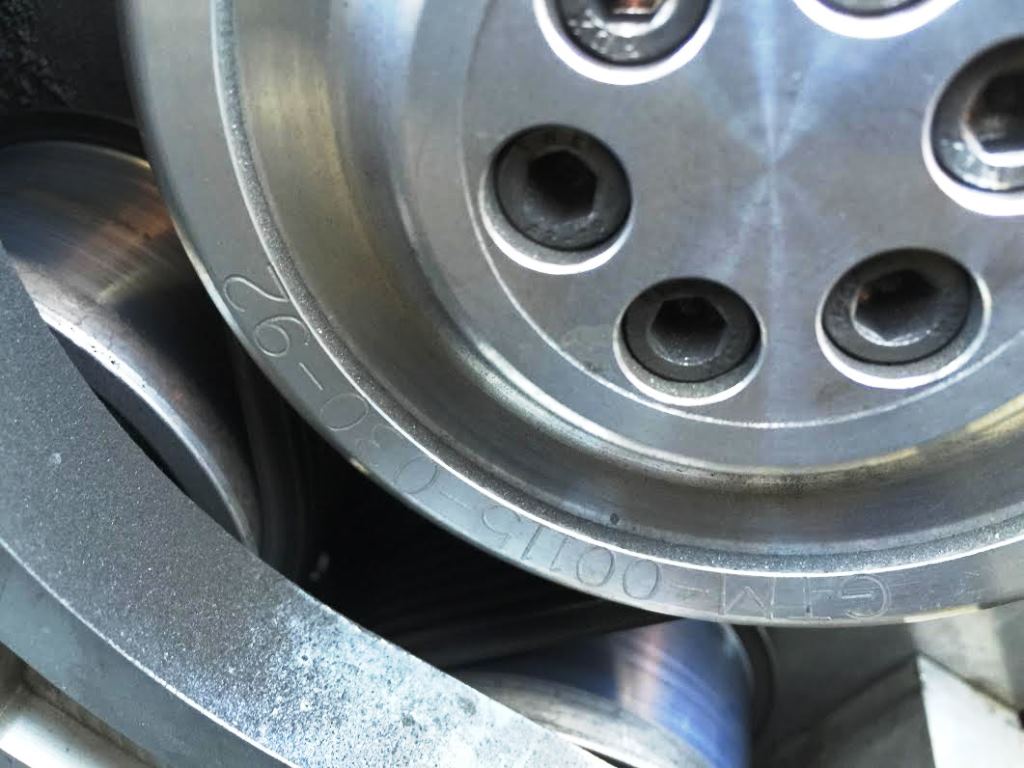
We looked at our next deal maker, the SC pulley size. The larger the pulley, the slower it will spin. The smaller, the quicker and the more boost it will produce for a given engine speed and balancer size. One must take care in making sure to not overspeed the supercharger. Thankfully for us our engine only revs to about 6100 RPMs, giving the SC some headroom from overspeed. The pulley on the kit came with a 92mm. We stepped “down” to the smallest offering of 84mm. Many thanks to Pablo at GTM for hand delivering the pulley to us! Thank you so much! What did the 8mm decrease in size get us?
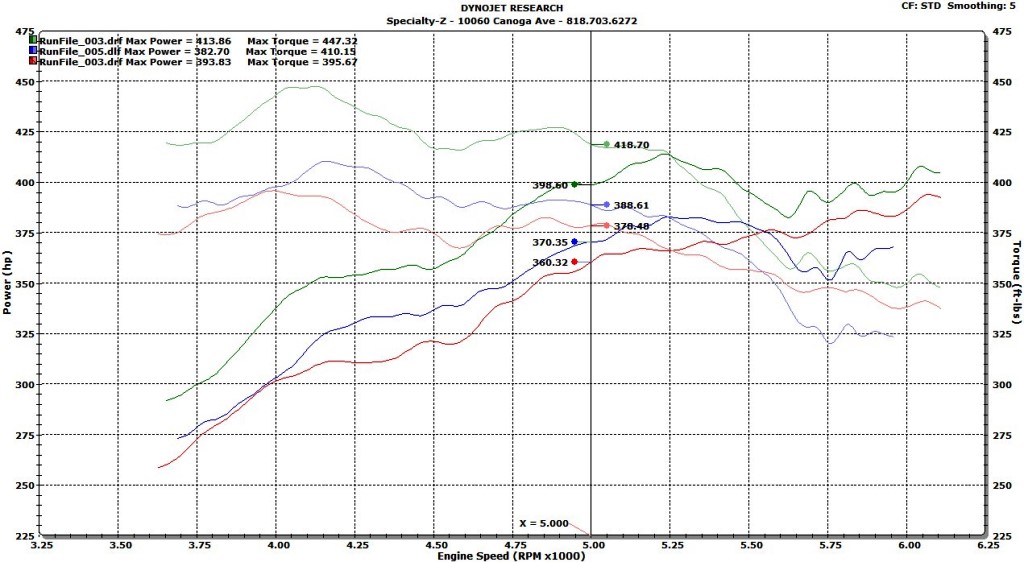
This graph shows the base GTM kit with no mods in red, our bolt on mods with the base GTM 92mm pulley in blue, and our 84mm pulley with mods (latest and final) in green. We picked up significant power all over. Peak torque now comes in nicely with a total of 447 and peak power of 413. We found an average gain of 30 whp and torque throughout the powerband. Boost came back up to 6 psi.
The last upgrade we performed was a Eaton True Trac LSD for DRAMATICALLY improved grip and 3.73 rear end gears, up from a pathetic 2.93. Needless to say, the Titan has embarrassed its share of cars who were left shocked and speechless.